to Build a 100% Flash Site
|
[Page 1] [Page 2] [Page 3] [Page 4] [Page 5] |
16. Finaly add a new layer after all those button layers. Name it "Button Text" then go to frame 8 and press F6 to create a new key frame and in it add text on top of where the buttons end up in. This is your button text. |
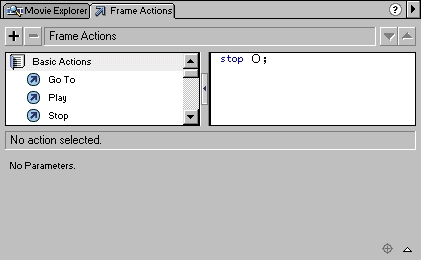
| 17. Create a new layer name it "Stop" and go to frame 8 and press F6 to create a key frame and double click on the frame. A dialog box appears. Double Click on "Basic Actions" and drag the arrow next to where it says stop to the right. Then close the dialog box. |
 |
| 18. Now you've created your intro animation and your navigation bar. |
| 19. Lets Create different pages for the site. After all the buttons need to lead some where. This is where using multiple swf files comes in. Create a new layer and name it "Section 1". Go to frame 9 and create a keyframe (F6 incase you forgot). And drag an instance of "Button" some where over on the screen. Now resize it to a very small square, And make it completely transparant, like we did in step 9 just not 30% but 0%. |
 |
| 20. Go to frame 15 and create a keyframe there (Not telling you how to do it this time). Resize the white square to a very large square that will be the background for your page. |
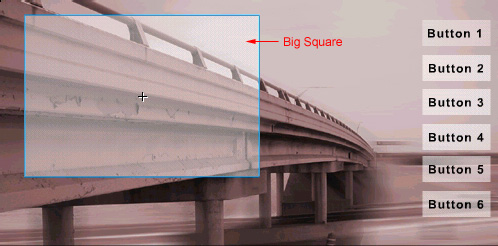 |
| 21. Click somewhere between frame 9 and 15 and add a "Motion Tween" (Step 15). |
| 22. Click on frame 9 and go to the "Frame" tab like in Step 15 but this time add the "Label" "Section 1" |
| 23. Go to frame 15 in our "Stop" layer and repeat step 19. |
| 24 . You can do the same for the rest of the buttons just start them from frame 16 to 22 instead of 9 to 15 and so on. |
|
[Page 1] [Page 2] [Page 3] [Page 4] [Page 5] |